Texturing (Creating A Splatting Texture)
From WiCWiki
Contents |
Creating a Splatting Texture (Introduction)
Advanced Tutorial
How to give your maps that final “professional” texture
Tutorial by EvilViking
Note: If you’re reading this, I assume you are familiar with the tutorials “Texturing (Basic Tutorial),” [[1]] “Introduction to Terrain Painting” [[2]] and “Texturing With Masks (Advanced Tutorial)” [[3]].
You will also need a large amount of RAM, preferably at least 1GB, as you will be working with image files in excess of 250mb at the same time.
What is a splatting texture?
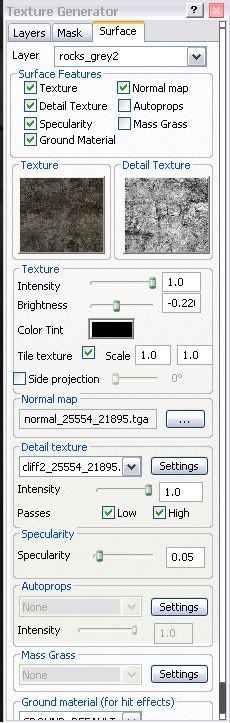
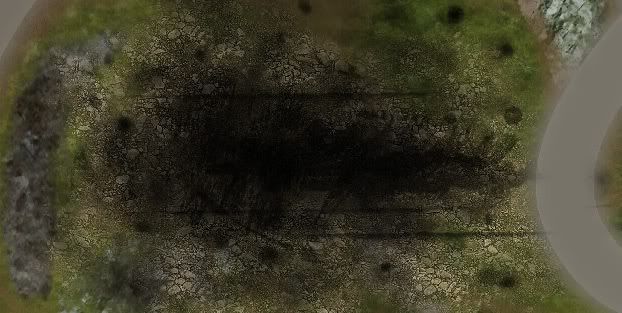
First, what is a splatting texture? A splatting texture is a 8192x8192 texture of your entire map, including all of the layers, merged together. Instead of texturing each layer, you simple add detail texture layers on top of your single texture layer. If you downloaded the version of the Modkit with the example map, you can see the splatting texture for “europeTest” under you WiCEd directory here:
World in Conflict ModKit\editordata\grounded\splattingtextures\8k\europeTest\europeTest_8k.tga
[Sample image coming soon]
This tutorial assumes that you have some experience using custom textures in WiCEd, as well as experience in your image editor of choice, be it GIMP, Photoshop, or a similar capable editor. For this tutorial, I will be using Photoshop CS3, but most of the functions should easily translate to other programs. You will also need a large amount of RAM (at least 1 GB, 2 GB of DDR2 RAM is what I use, and I still occasionally get “Out of Memory” errors) and at least 2-3 GB of available hard drive space. Also remember, any sizes I mention (IE, 1024x1024, or 8192x8192) are in pixel format, not picas or another format.
Preparing Your Map
Before you begin to work on your splatting texture itself, you have to get your map ready:
At this point, I highly recommend creating a backup copy of your entire map folder on an external drive or other safe location.
- Make sure that your terrain is basically how you want it for the final version of your map. You can make changes to it after creating your splatting texture, but it may no longer match up if you change things too much. Once you create a splatting texture, your textures are no longer automatically changed. IE, if you decide later on that you don’t want a certain cliff, and you level it, the cliff texture no longer reverts back to grass/dirt when you re-render. You must change that spot to grass/dirt in Photoshop on your splatting texture, re-load it, and then re-render.
 The cliff is gone, but the cliff texture remains.
- Write down all of your current layer settings in WiCEd. This may take a while depending on how many layers you already have in WiCEd, but it may prove important for getting your layers back together later. Be sure to include the default layers that WiCEd created, like grass and cliffs, as well as your own textures, like concrete and asphalt.
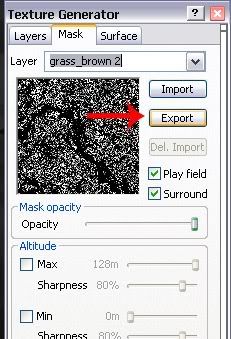
- Export all of your masks from WiCEd into a folder where you won’t lose them. Once again, be sure to include the default layers that WiCEd created, like grass and cliffs, as well as your own textures, like concrete and asphalt. Be sure to clearly name them as well.
 ]
]
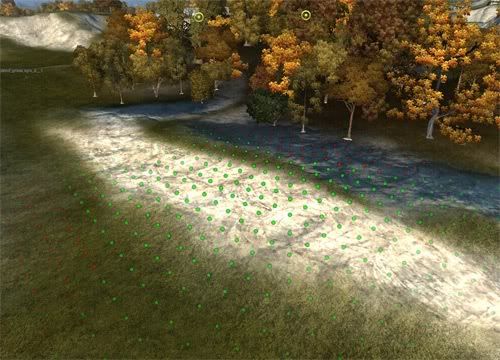
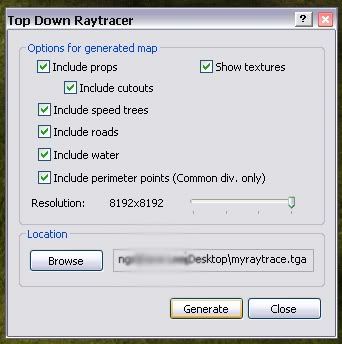
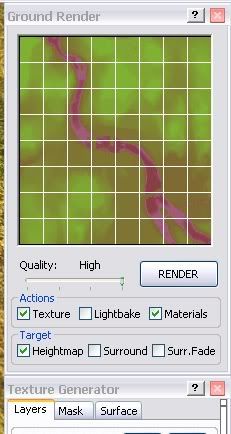
- Hopefully, you haven’t locked your roads yet, or if you have, you rendered a raytrace image first. (Locked roads will not render on the raytrace image) If you haven’t raytraced yet, press “E” in WiCEd, check all of the boxes, and increase the resolution slider to 8192x8192. Browse to where you want to save the image, and click “Generate.” This will create an exact top-down view of your map in black and white in TGA format, which is very useful when painting details onto your splatting texture later. Remember, if your roads are locked they will not show up in the raytrace image!
- Render your entire map on the Maximum settings. The "Lightbake" setting can be turned on or off, it does not matter.
Whenever you render a texture using the Ground Render dialog, image files are created in the folder "World in Conflict Editor\editordata\wiced\temp". If you render the entire map (all tiles), the big file "blendedmap.tga" constitutes your entire ground texture without lighting.
You can copy this file, open it in a drawing program, modify it and then assign it to a new texture layer in WicEd (you should mute or dispose of all underlying layers). Now you can perform new lightbake operations - or put new layers - on top of your hand-modified texture.
IMPORTANT: Never use the file "shadedmap.tga" in this way, because you will get "double" lighting if you lightbake it again later. Also, remember that the "temp" folder is deleted when you exit WicEd, so copy your "blendedmap.tga" to another folder.
- Open the folder "World in Conflict Editor\editordata\wiced\temp" and copy "blendedmap.tga" into a new folder, where you will also be saving your splatting texture.
- Save your map, and close WiCEd.
Double check the above list and make sure that you have done all of the steps!
Creating the Splatting Texture
Now, it’s time to create our splatting texture!
1. Open Photoshop.
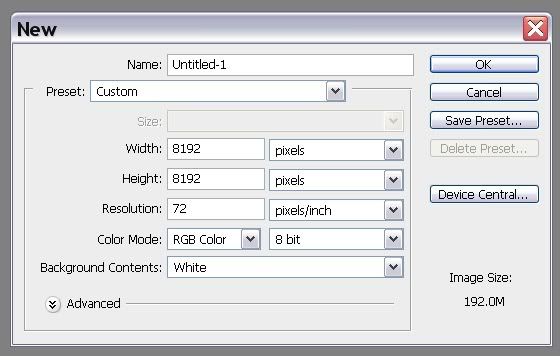
2. Create a new RGB image, 8 bit, 8192x8192 (pixels).
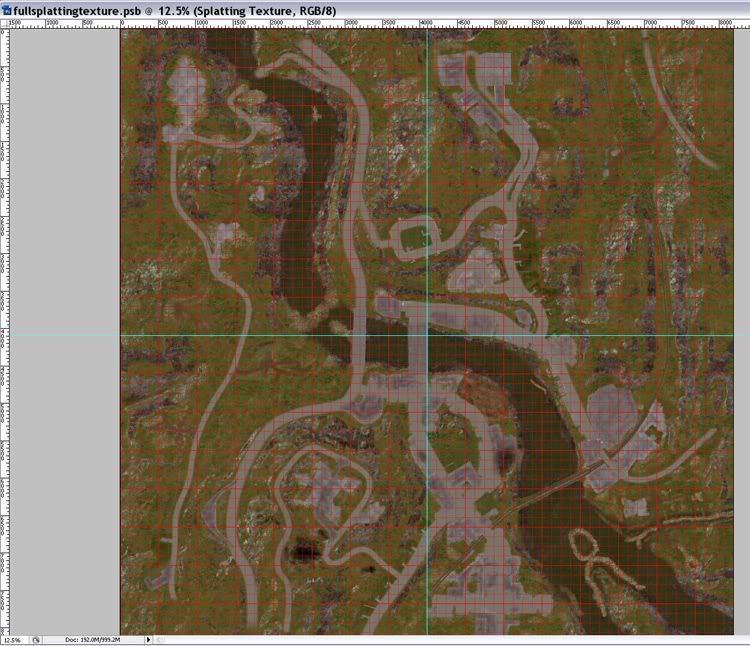
3. Open the copy of "blendedmap.tga" that you saved earlier. Drag it into your new document, and align it with the edges (the Snap setting is useful for this).
 (Note that this splatting texture has been detailed further)
Notice that I have created two guidelines to divide my splatting texture into four sections. This will come in handy later on when you create a normal map for your texture.
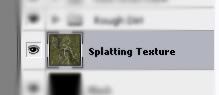
13. Name this new layer “Splatting Texture”. Delete the “Background” layer if there is one.
14. Save your image. I would suggest Large Document (.psb) format. If not, choose Photoshop (.psd) format so that your layers stay intact.
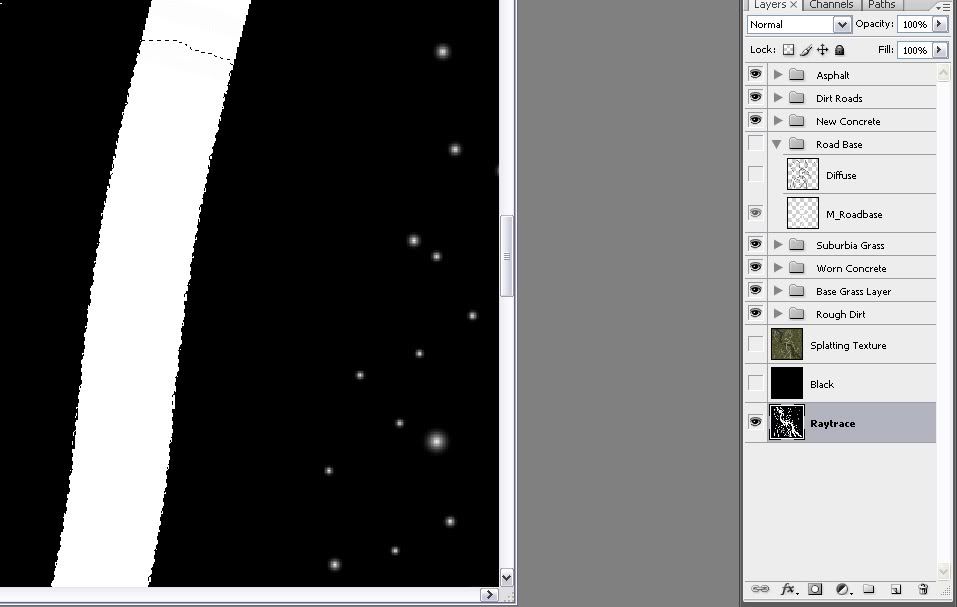
15. Remember that Raytrace image that you saved from WiCEd earlier? Open that in Photoshop, and drag it into your Splatting Texture, carefully aligning it so that it fits exactly within the image borders. Name this layer “Raytrace” and drag it to the bottom of the layers list. Create a completely black layer between the “Splatting Texture” and “Raytrace” layers.
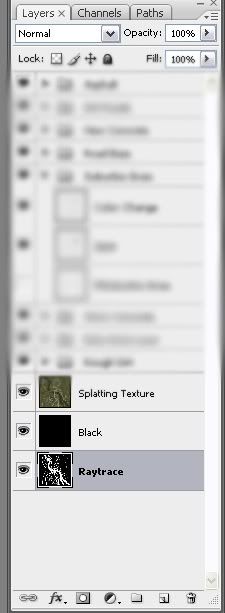
The raytrace image will server as reference when you’re painting new details onto your splatting texture, and the black will provide a background when you update masks that you created.
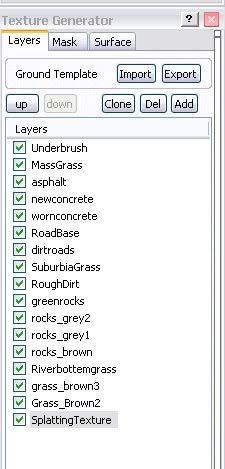
16. Open the folder where you saved all of your masks out of WiCEd earlier. Look at all of the names, and create folders in your splatting texture “Layers” section for each mask:
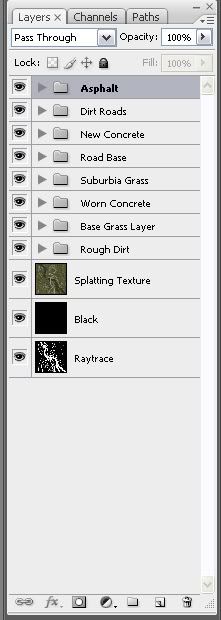
Notice that I skipped over the default grass, rock and dirt masks. This is because I don’t plan on changing them at all. I would suggest that you import all of the masks unless you are completely sure that you don’t want to change them. Even though I don’t plan it changing those masks, I know for sure that I will be adding in new asphalt, concrete, dirt, etc.
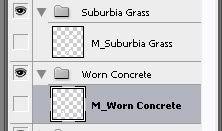
17. Load each mask into the appropriate folder in your “Layers” section. Notice that I gave the mask layers an “M_” prefix and then named them for what they represent:
18. You’re all set to edit your splatting texture! It’s at this point that exact instructions may differ, depending on what you plan on doing with your splatting texture. Next, I will simply provide general examples/suggestions as you work on your splatting texture.
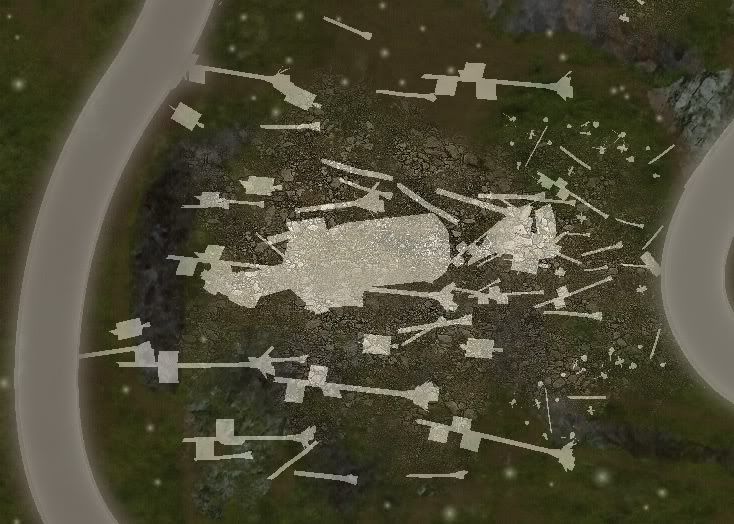
Plane crash example:
1. I have a plane crash on my map, and I wanted to create some cool scorch marks. First, I changed the opacity on the “Splatting Texture” layer to about 60%, and hid the “Black” layer, which let the “Raytrace” layer ‘bleed through.’ I then checked the location of the wreck prop on my map:
2. I then changed the opacity of the “Splatting Texture” layer back to 100%, hiding the other layers again. I decided that I wanted the scorch mark to share the detail texture of whatever was below it, so I decided not to edit/create a detail texture mask for it.
3. I created a new layer under the “Rough Dirt” folder (the detail texture that I wanted my scorch mark to share), and painted the scorch marks onto that new layer.
All done with that one! Remember, scorch marks generally only modify what’s below them (at least for WiC maps), so they don’t really need their own masks or detail textures.
Road base example:
I also used my raytrace image to create gravel bases for my roads. Because this is a new layer that I did not have before in WiCEd, I must create a white/black mask for it first, to show WiCEd where to paint the “gravel” detail texture later. See “Intro to Terrain Painting Tutorial” for more information.
1. I used the Quick Selection Tool to select the road on my “Raytrace” layer, and then I used the fill tool with 100% white on a new layer:
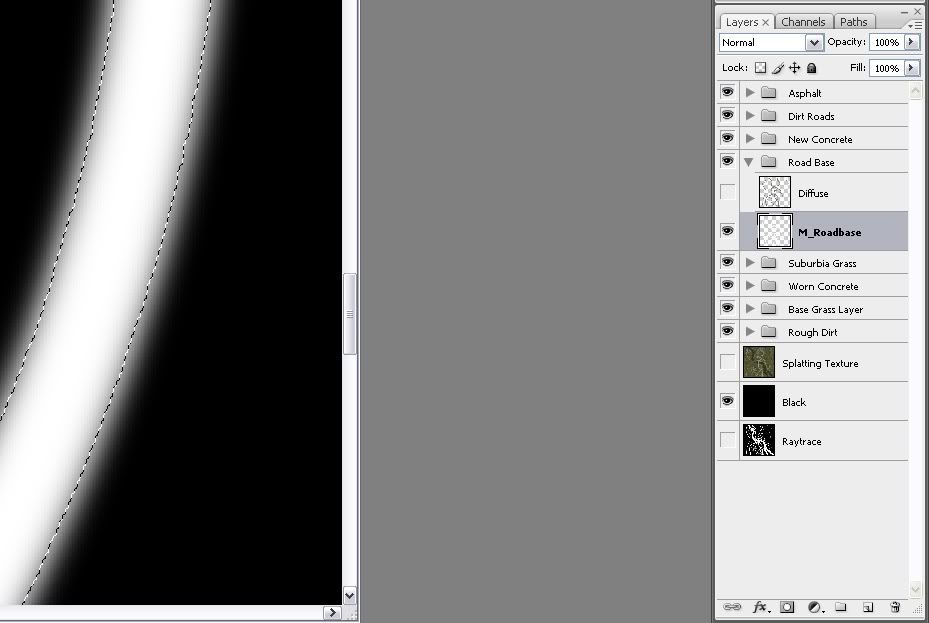
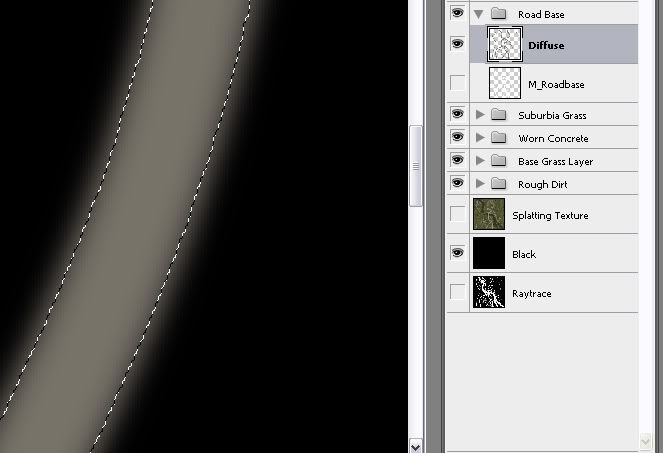
Note that I used that same “M_” naming scheme to mark that layer as a mask. I also turned the black layer on, and the “Splatting Texture” and “Raytrace” layers off (made them hidden) so I can see my mask clearly. Make sure you have the correct layer selected before you use the fill tool! 2. Without deselecting my selection, I created another layer for the color of the gravel. I then used a modifier on my selection to increase it’s size slightly (so it comes out from underneath the roads) and to blur the edges. I then used a brownish-grey fill on my new layer to create the color.
Other Uses
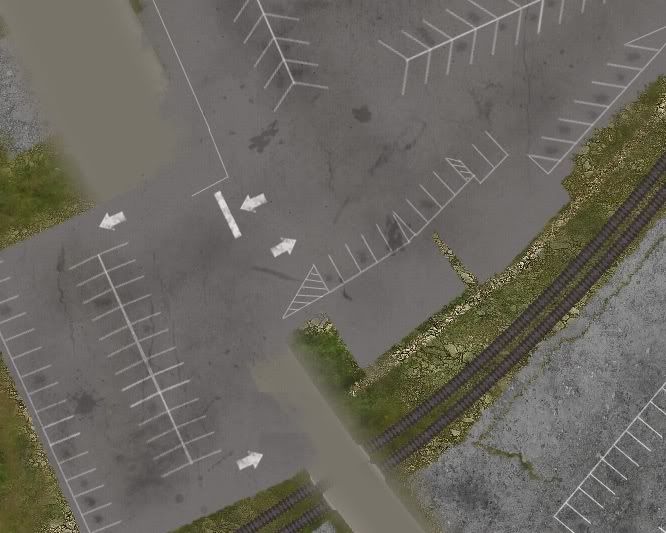
Try using your splatting texture to create parking lot lines, wear marks on asphalt, and other effects! Just remember, keep updating your masks before you update the splatting texture itself! Otherwise, you may end up with grass-detailed concrete, or other unpleasant results. Some new layers, like parking lines, can share existing masks, like “asphalt” and “concrete”. In these cases, just paint your new details where you know the correct mask already exists.
Preparing Your Splatting Texture for WiCEd
1. If you’re done editing your splatting texture for now, save it. Then, export any masks that you have updated. Use the black background, and hide all of the other layers, and then use File > Save As to save each mask as a separate .TGA. Make sure that you save them in a folder under your WiCEd directory, such as “World in Conflict ModKit\My Map\Splatting Texture”.
2. Once you’ve saved all of the masks out, hide them all. Turn on any color detailing that you have added. (In other words, turn on any layers that aren’t “Raytrace”, “Black”, or a mask)
3. Check and make sure that your splatting texture looks like you want it to. Then, go to File > Save As and save your splatting texture as a .TGA in a folder under your WiCEd directory, such as “World in Conflict ModKit\My Map\Splatting Texture”.
4. Now you should have one full color 8192x8192 spatting texture, and a set of updated 8192x8192 masks. Now, we need to re-layer the textures in your map to accept these. Open WiCEd.
5. Go to the Layers inside of WiCEd. For each layer, import the updated masks.
6. Once you have updated all of the masks, go through each layer, and uncheck the “Texture” box on each.

What this means is, each layer will only apply a detail texture according to its mask, not a texture color. These layers will get their color from the splatting texture, which we will add next.
7. Now, create a new layer called “Splatting Texture”. Give it no custom mask (so the mask is completely white), and then load in the splatting texture TGA that you saved earlier. Give it the detail texture that will be the “base” detail texture of your map (usually grass).

8. Finally, move this layer to the bottom of the list:
9. Render out some grids on “High” and see how it looks! If there are problems, check that you re-imported all updated masks, turned off all “Texture” options except for on the “Splatting Texture” layer, and that the “Splatting Texture” layer is on the bottom of the list.
Wrap-up
There are still a few things that I haven’t covered yet. As you can see, I have also created custom layers for controlling my MassGrass and Undergrowth. If anyone needs further help, please post it in the thread here:
http://www.massgate.net/read.php?77960,167125
Updates will be coming as well.
- EvilViking
