Introduction to Terrain Painting
From WiCWiki
Introduction to Terrain Painting (aka, "Texturing with Masks") By EvilViking
Beginner/Intermediate Tutorial
I've seen a lot of questions on painting textures in WiCEd, and as I had some issues with this starting out as well, I've written a beginner's tutorial on how to do it. The main issue I think people are having is that they're used to other map editors where you "paint" textures directly onto the map. Instead, WicED uses a much more powerful layers system, where you paint a black and white image in Photoshop that tells WiCEd where to paint that texture.
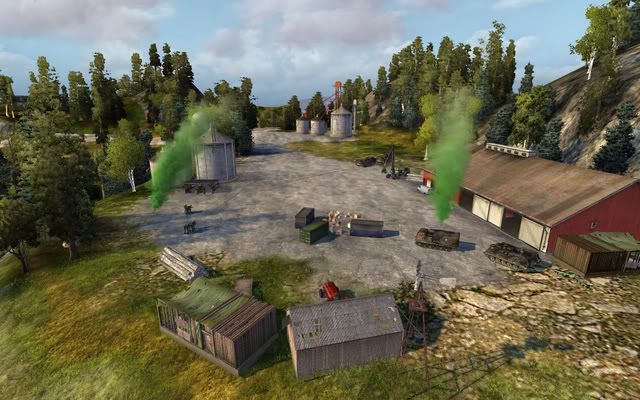
In my example from my map "Virginia", I will show you how I painted this concrete and dirt area onto my map:
Here is a detailed view of the mask layer that I used to tell WiCEd where to "paint" that concrete:
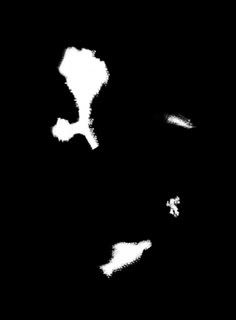
That large white splotch is the concreted area from the screenshot, at the Farm Equipment Depo. The white tells WiCEd to apply the texture from that layer (in this case, the concrete) and the black tells it not to. I made this mask in Photoshop using a "dirt" style paintbrush. Note: Massive recommends that you use a 8192x8192 size TGA image for your mask.
TIP: When you're in WiCEd, simply press "E" to bring up the Raytrace menu. Raytrace will create a top-down black and white image of your map in full size (8192x8192) that will show you where all your trees, roads, buildings, etc are. You can then use this image as a base layer in Photoshop to paint your texture masks.
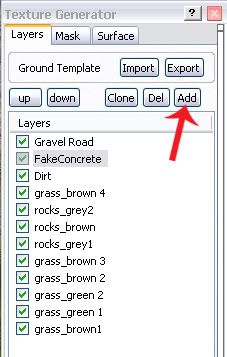
To load your new custom texture in WicEd, go to the Texture Generator under "Render" on the toolbar, and then add a new texture layer by clicking the "Add" button here:
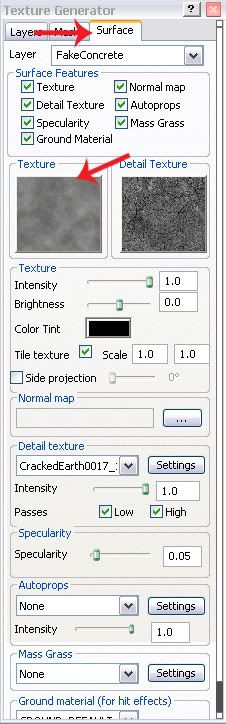
Now that you have your new texture layer, go to the "Surface" tab to load in the actual texture that will be painted. Click on the thumbnail (which is gray if no texture had been selected yet) and load in a texture, either from a custom .tga file, or one of Massive's default textures.
The default textures can be found under editordata\templates\ground. Then, just choose a final folder to view those textures (IE, "canyon" to see the desert textures used for that map type).
If you have custom .tga textures, the best way to import them is to create a new folder in the WicEd directory, like C:\Program Files\Sierra Entertainment\World In Conflict Editor\***Your Map Name Here***\MyCustomTextures and put your custom .tga files there.
Then you can navigate to that folder from the "Import" button.
Also, be sure to name your layer in that drop-down box!
Finally, load in that black and white TGA file that tells WicEd where to paint your new texture on the "Mask" tab:
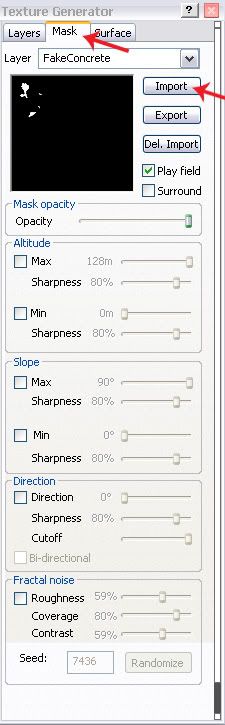
IMPORTANT: You should only use one large mask for each texture that covers your whole map. When you import your mask, BE SURE that on the "Ground Render" overlay box above [b]all of the map is selected![/b] Otherwise, WiCEd will only apply your mask to the area of the map that you had selected, resulting in mis-matched texture placement.
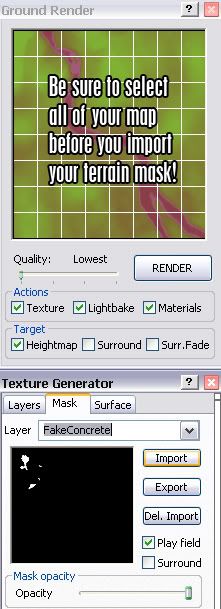
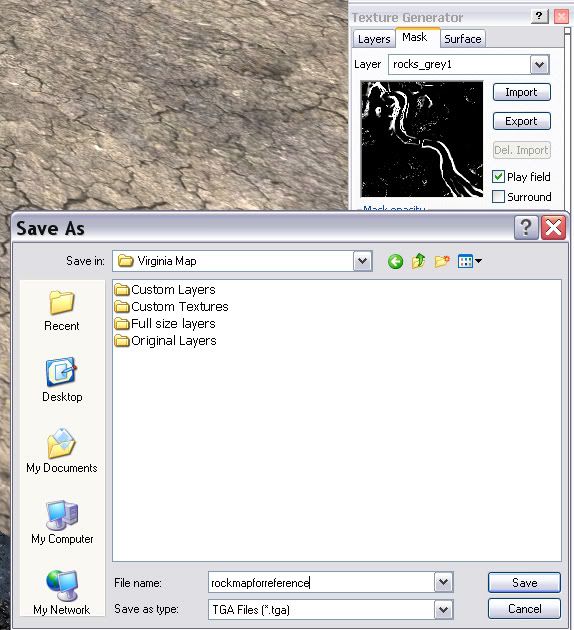
Select the part of the map that you just "painted" and render it to see how it looks! If you painted the wrong area, just go back to Photoshop and edit your mask, then re-import and re-render it. If you're having trouble relating your mask in Photoshop to your map in WicEd, try exporting one of the default texture's masks as a guide in Photoshop, such as this one:
By using layers like this for all of the textures, you can create a very detailed, truly "hand-painted" map! =)
This is just an introduction to this powerful feature. For all of the details, including normal mapping, see the full tutorial from the Wiki on this: http://wiki.massgate.net/Texturing_With_Masks_%28Advanced_Tutorial%29
- By EvilViking
